There area a ton of equipment and other resources available for Aalto University users for creating media and building immersive experiences. To find these tools, then plan their use and reserve them for pickup, Takeout Pro is our extremely efficient app for doing all that.
This document introduces the key concepts and features, and walks you through some of the typical workflows.

What’s the difference to regular Aalto Takeout?
The trusty takeout.aalto.fi service in public use (Takeout Classic) has limitations with users wanting to do high volume reservations and manage multiple projects among peers. Course co-ordinators, production managers and student projects with multiple members are our core audience for this new software, and in time it will be an available choice for anyone wanting more control.
Birds eye view of everything
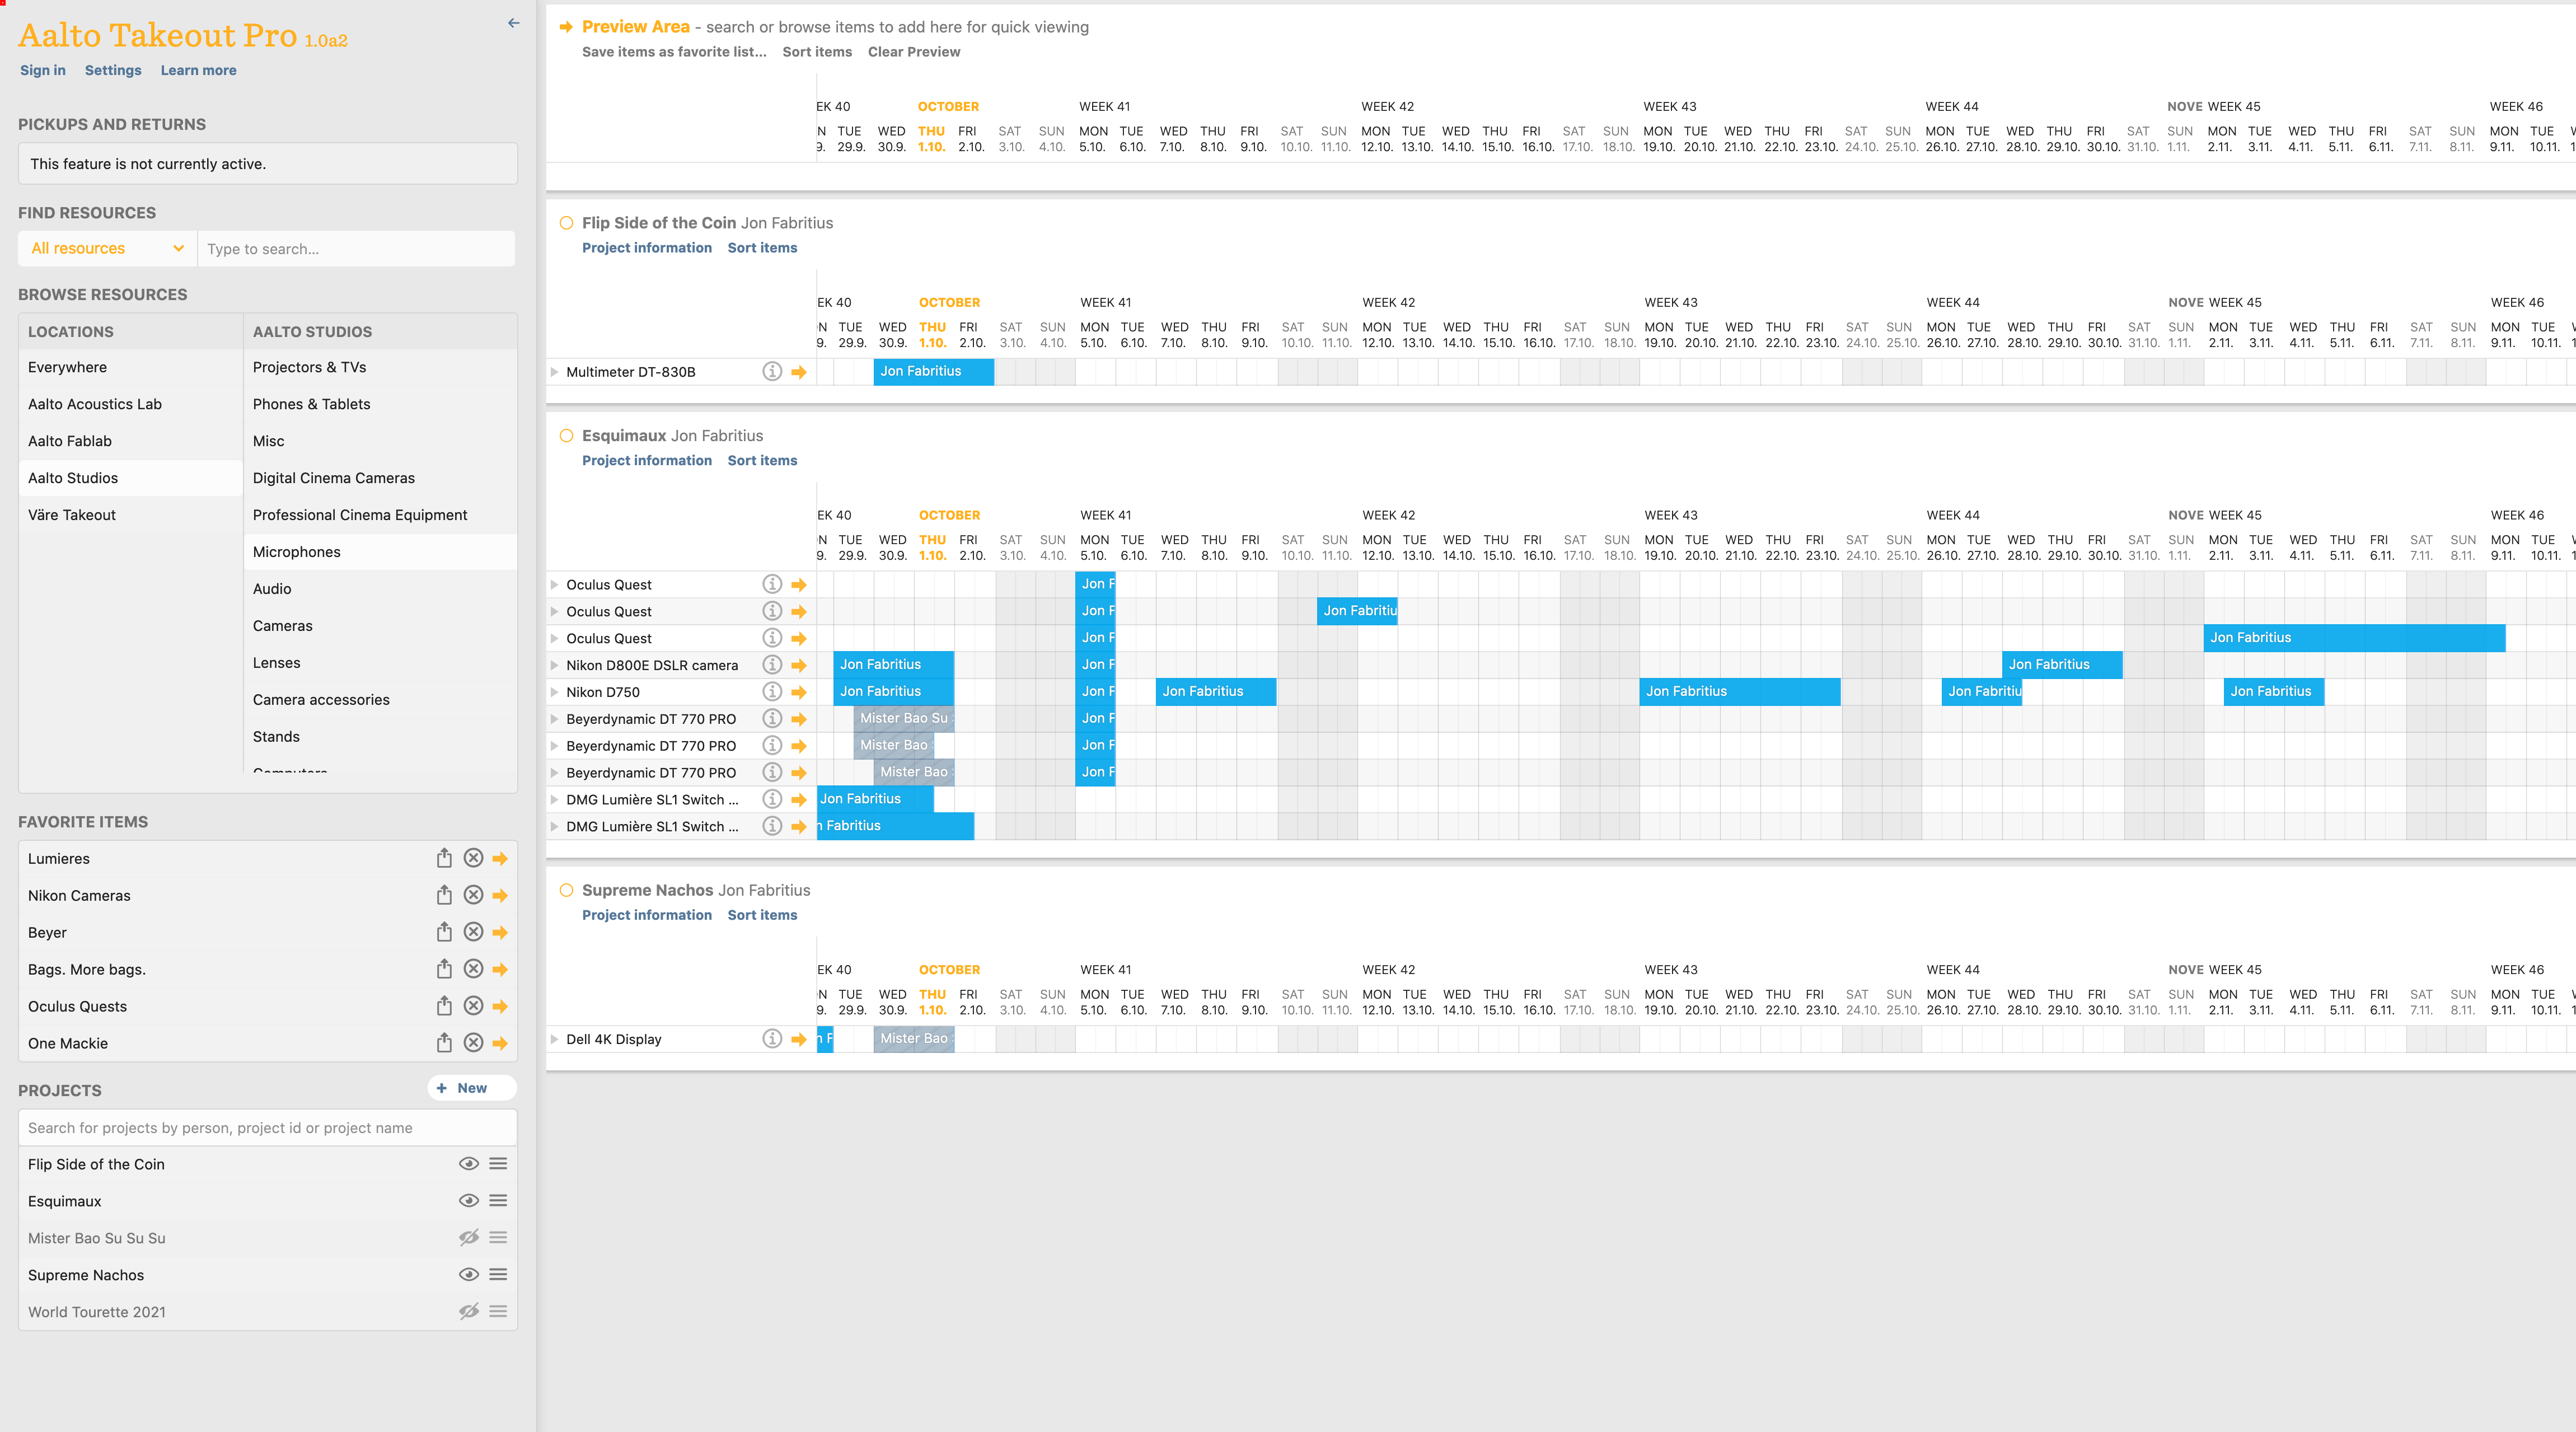
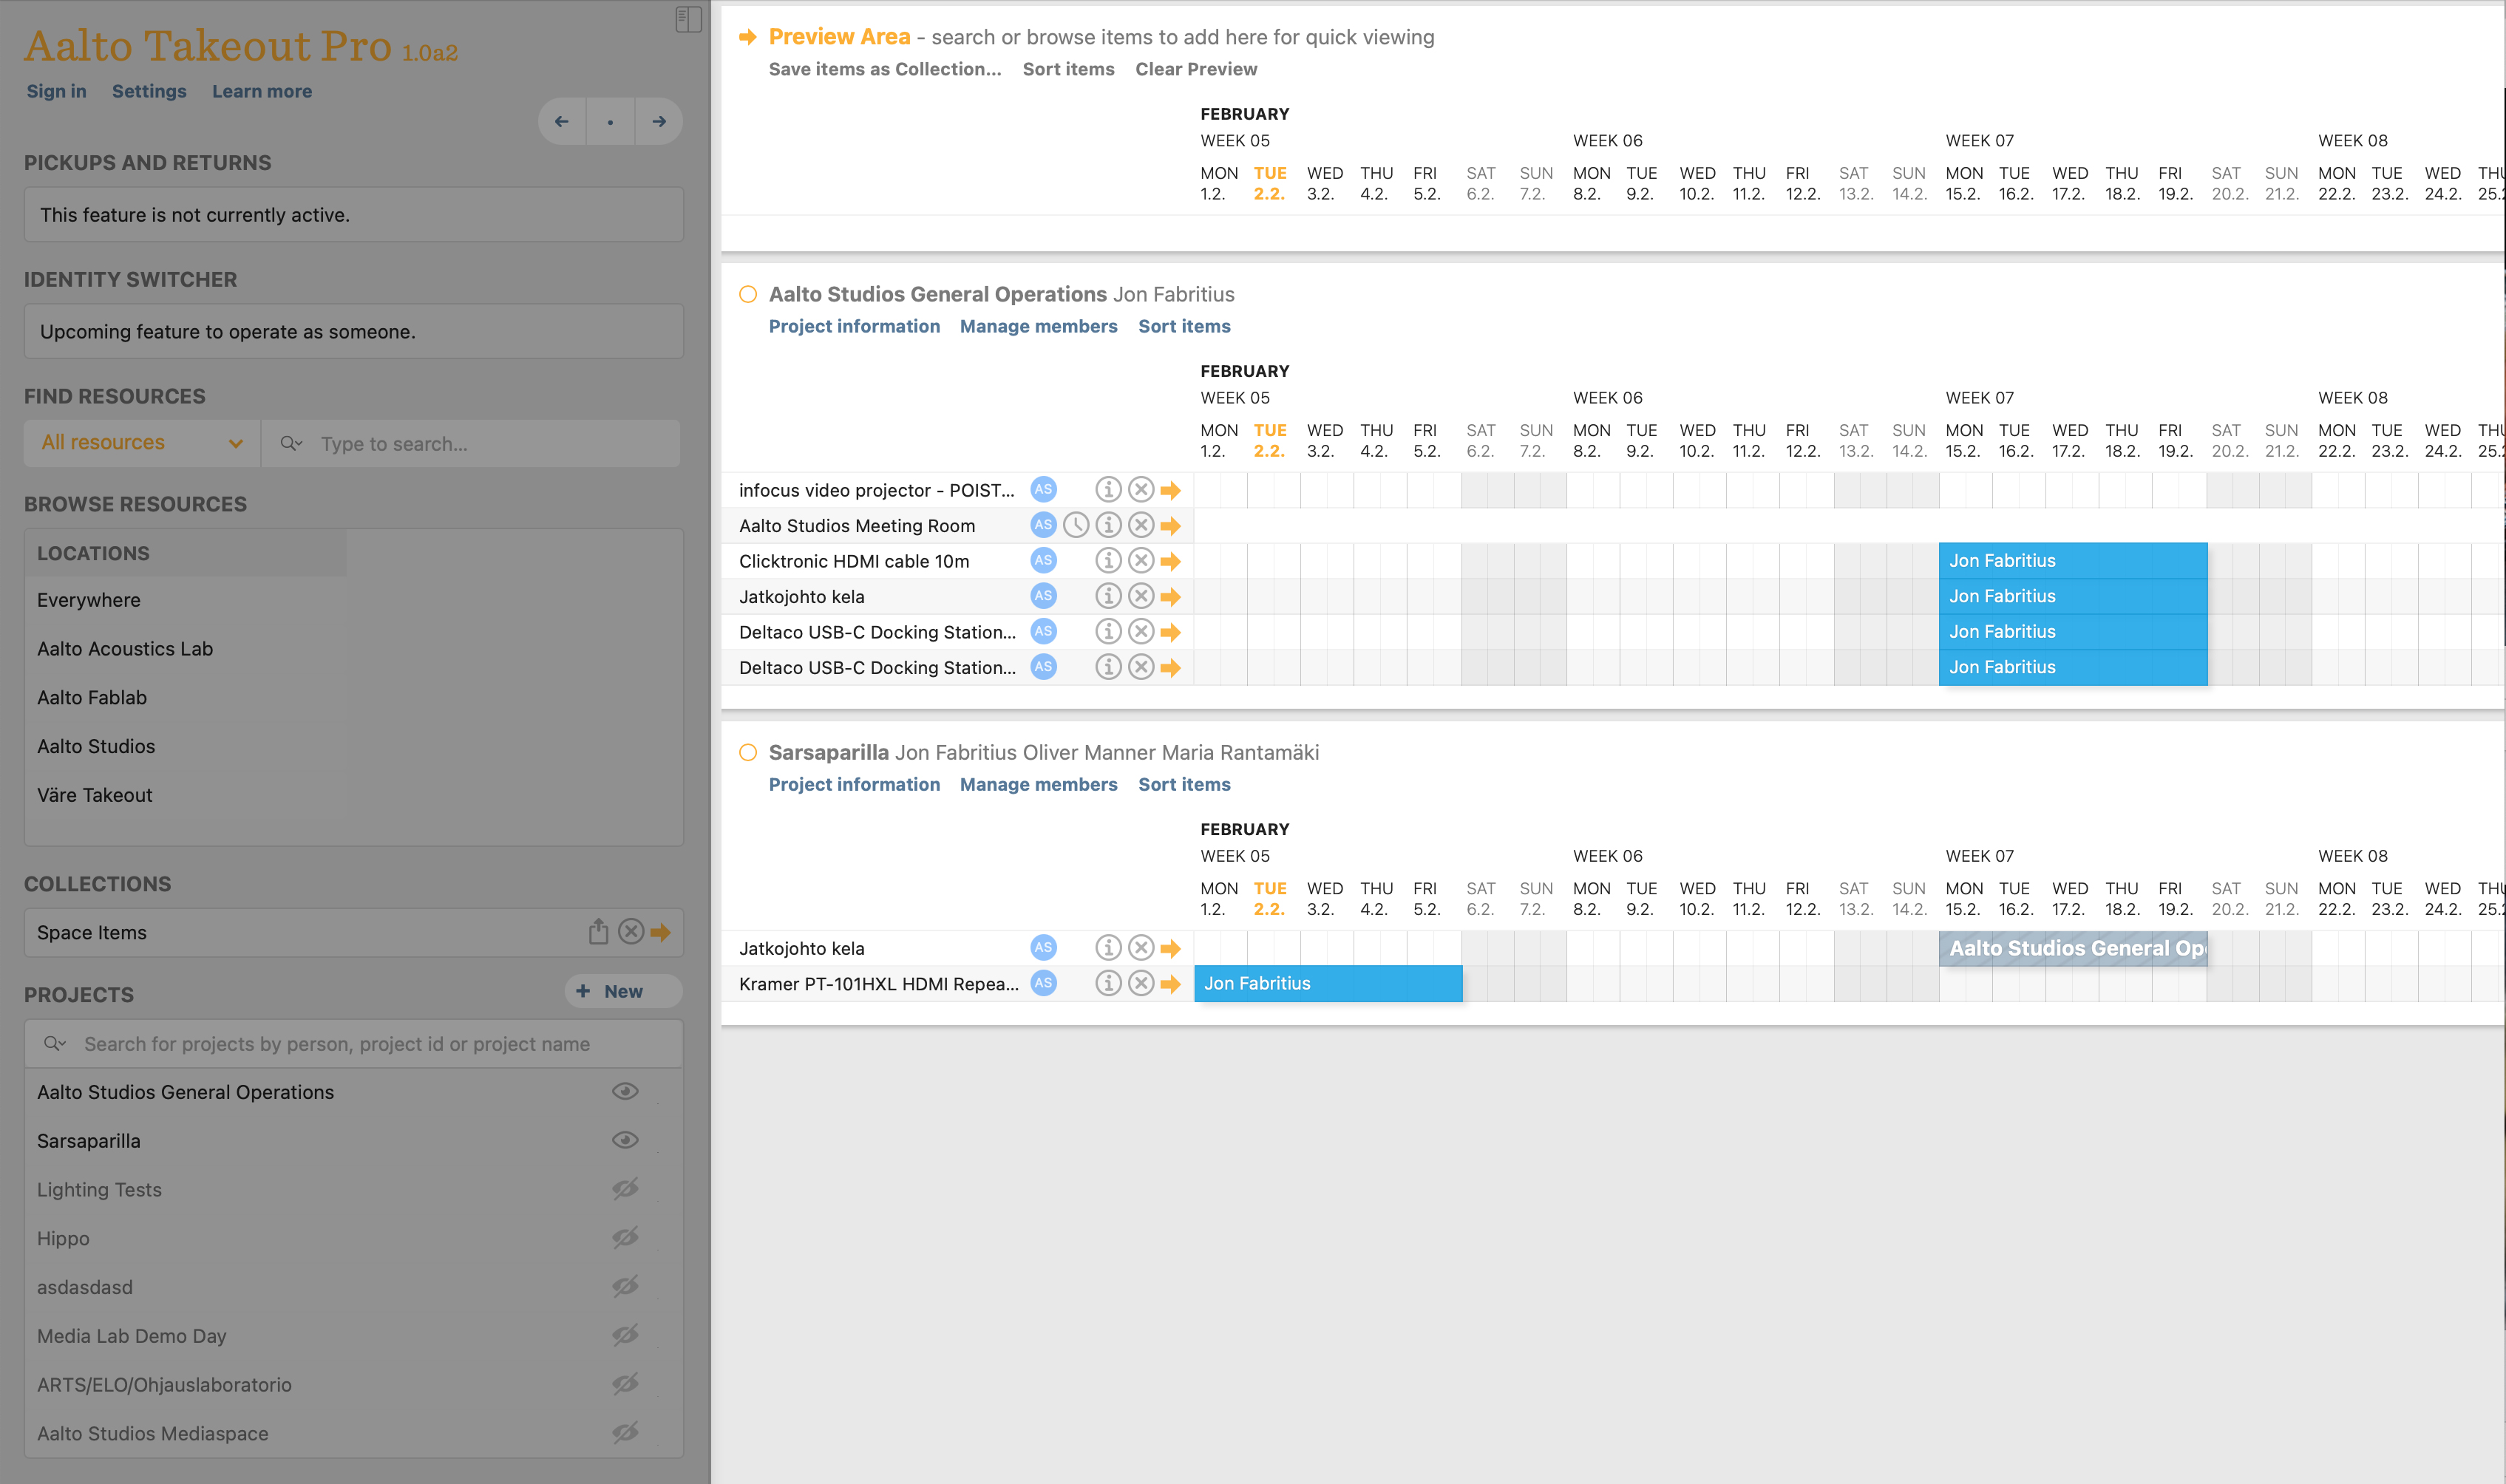
Takeout Pro minimizes the need to click back and forth by displaying volumes of information on one large surface. A months long timeline features all your projects, with all their bookings visible up front, right when you load the app.
The reservation status of any resources can quickly be called up for comparison in the new Preview Area on top. And favorite items can be stored in Collections for later use or sharing with others.
Speed
Searching, browsing, scrolling and creating reservations is fast. Keyboard shortcuts let you perform tasks even faster.
How can I use it?
Takeout Pro is currently in private development use. We’re in a limited beta for late now and will expand it later. To apply for access, contact us at studios@aalto.fi.
Introducing the key concepts
The Project Area
Comprising the bulk of the interface, the large Project Area shows a list of Projects you’re a member of. Takeout uses projects as shopping carts for any resources you want to book, helping you separate items per use case, and letting us learn more about how things are used.

Preview Area
To quickly review any resources available, you don’t need to put them directly into a project. The Preview Area is a blank slate where you add items using Search, by Browsing Resources or by Sending Items from an existing projects.
A typical workflow consists of adding lots of items into the Preview Area to see what’s available, then booking them right there into your project of choice.
Items you’ve collected in the Preview Area can be saved for later as a Collection, a list of favorite items.
Project Cards
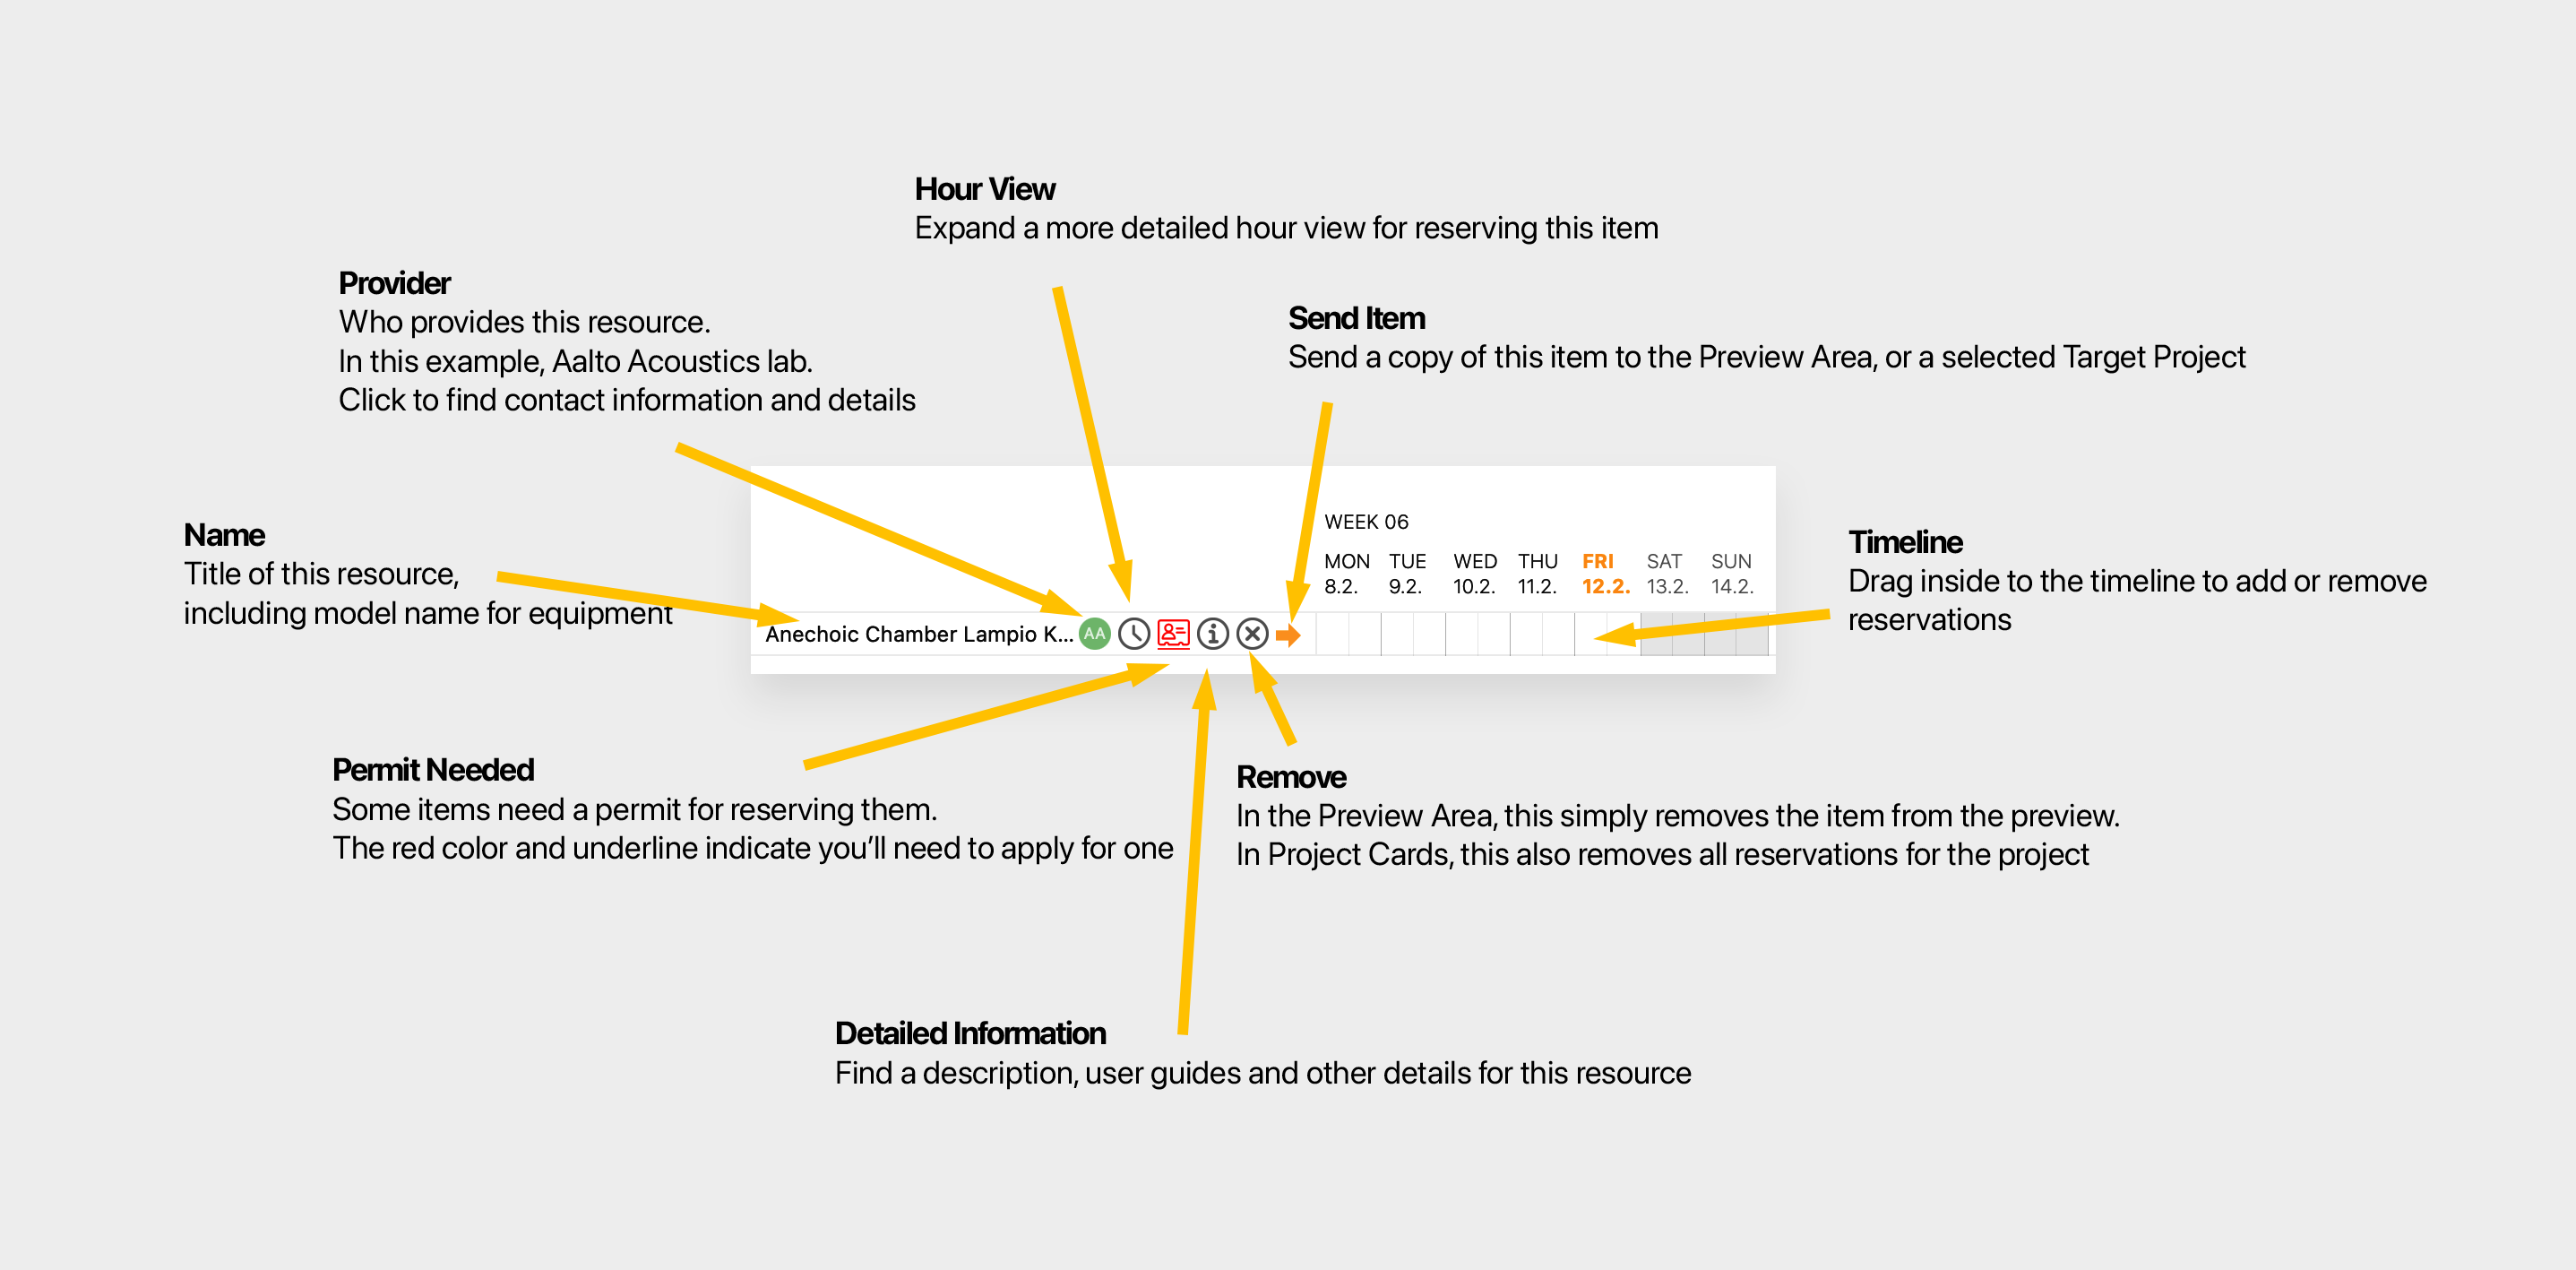
Project cards list all the reserved resources as a list of timelines. Some of the timelines expand to a more detailed day view, for more granular hourly booking of spaces or personnel. Both the timelines themselves and the events appearing along them feature various tools for interacting with them.
{ example card in closeup here }
All associated information on a Project, such as members, project descriptions, course and project numbers, and more are managed in these cards. Not limited to your own cards, this area can host other people’s projects for temporary inspection, and for editor level users, management of their data.
The Toolbar
This is where resources can be found and added to the Project Area.

Pickups and returns
A list of upcoming pickups or returns of items at one of the equipment lending offices on campus, so you don’t miss the time window. Here you can also add the feed to your calendar of choice as a subscription.
Identity switcher
Available to editor level users, a management tool for performing actions on the behalf of another user.
Find resources
Our really fast, slightly fuzzy search finds items from all the offices, based on names, descriptions and keywords. The location of resources and the count of identical items is displayed inline, with the option to view detailed information using the (i) tool.
Picking any of the results sends them to the Preview Area for quick review of their availibility.
{ workflow video needed here }
Browse resources
To see what’s available by category, this column browser let’s you drill down to spesific kinds of items at the various offices and then send the items to the Preview Area en masse for seeing what’s available.
{ workflow video needed here }
Collections
Items collected in the Preview Area by finding or browsing can be saved as Collections for repeated use. Use it for your favorites, or subscribe to one of the shared lists maintained by the offices, such as New Cameras { placeholder example }. You can also share your collections to other users.
Projects
This remote control for the Project Area lets you hide, sort and create new projects. For editor level users, the Project Search tool finds people and their project titles, for adding them to the Project Area for further management.
The Timelines
All resources are represented by timelines, which come with a set of tools for interacting with the equipment or space in question.

Workflows
These examples of everyday use introduce the tools in more detail.
Starting from scratch: creating a new project and booking a few resources
After signing in for the first time, long time Aalto Takeout users will be greeted with the same projects already created using the Classic version. These tools use the same data and can be used interchangedly.
Users with no prior projects will be greeted with an empty, serene view, but the tools for finding and browsing items are ready to go, no projects are needed to just have a look around.
Step 1: Create a new project
In the Toolbar, locate the ’Projects’ area and the ”+ New Project” button.
{ screenshot }
A new empty project is spawned in the Project Area.
Step 2: Fill in project information
Detailed information helps us develop Aalto Takeout, and in the case of personal projects a good description is required for approval. To learn more about how the information is stored, see our policies on data privacy.
Save the project information and you’re ready to go.
Step 3: Find and add an item to the Preview Area
Using the ’Find resources’ search box in the Toolbar, look for an item called ’Pineapple’. For safety, we’ll not be booking the more popular items during this exercise.